A Passport is an essential and one of the most important travel document for those who are traveling aboard for family visits, education, tourism, medical attendance, business, pilgrimage and another purpose. It is not necessary that you need a passport only if you are traveling aboard but you can also use it as an essential identity and address proof.
The Indian passport was issued by the Ministry of External Affairs (MEA) Government of India under the passport act 1967. It helps to certify the holder’s identity as a citizen of India by birth or naturalization and ensure that he/she can travel to foreign countries under the Indian Government protection. In India, passport service provides through Central Passport Organization (CPO) and Passport Seva Kendras (PSKs).
Indian passports are issued at more than 93 passport office located across India. According to Wikipedia, in 2015, India issued a total of 12 million passports and approximately 65 million Indians held a valid passport at the end of 2015. To meet this increased demand for a passport the Ministry of External Affairs (MEA) launched the Passport Seva Project (PSP).
Ways To Apply For Indian Passport
There are two different ways to apply for passport in india is online and offline method. However the online is the most preferable mode as the application procedure is easily done and less time-consuming.
In order to apply for a new passport or passport related service, you must need to book an appointment at the Passport Seva Kendras or Reginal Passport Office. You can easily book an appointment online by logging into the official website of Passport Seva, you need to fill the passport application and submit the requisite fees to confirm your request. After your appointment is booked successfully you need to printout the ARN receipt and visit the place when the appointment is scheduled for passport application.
Step By Step Procedure To Applying For Passport In India
If you want to apply for a passport online in india then you need to follow some steps are described in details below. If you don’t have an account on passportindia website then first you need to create a new account and then log in to your account.
PassportIndia Registration Process
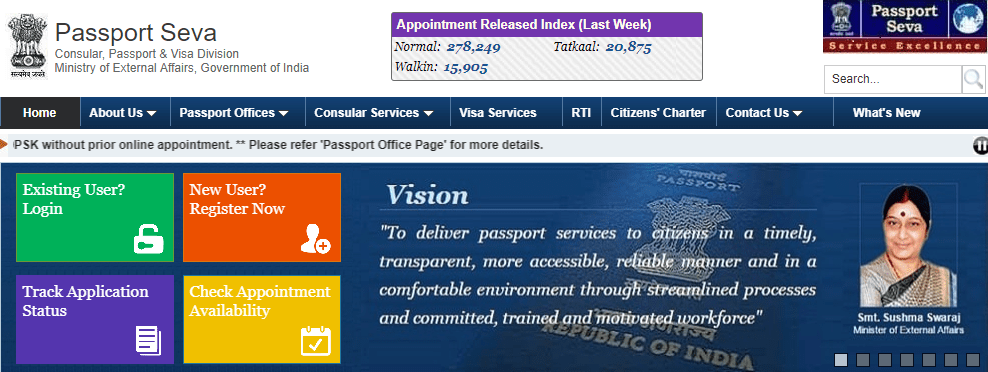
Step 1: First, go to the official website of Passport Seva www.passportindia.gov.in. On the left side, you can find the four different color of boxes in Green, Yellow, Blue and Orange.
Step 2: To create a new account click on “New User? Register Now” option available in Orange color.

Step 3: In the next screen, you need to fill the form to complete the registration process.
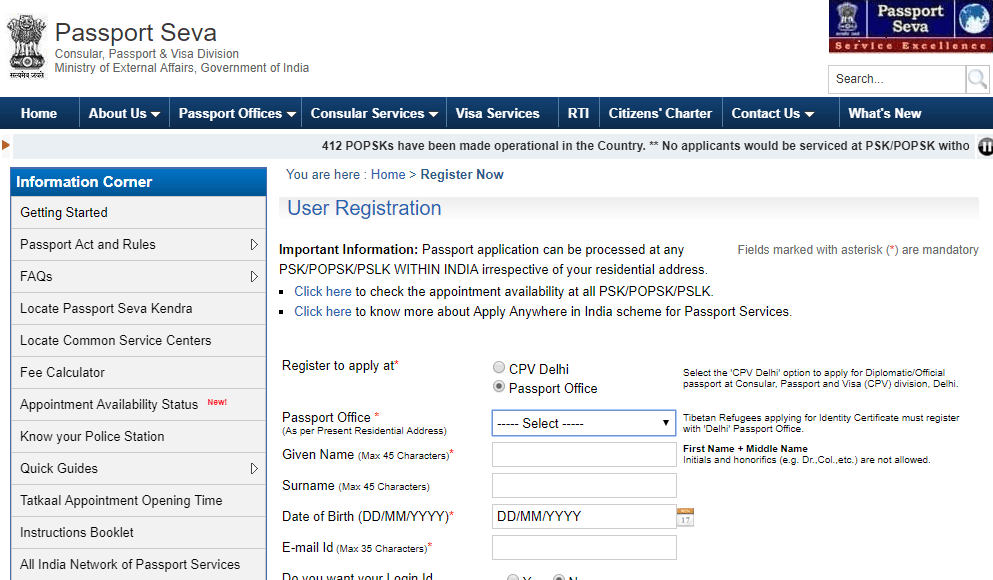
- Register to apply at: By default the “Passport Office” option is selected and select “CPV Delhi” option if you want to apply for Official/Diplomatic at consular, Passport and Visa (CPV) division, Delhi.
- Passport Office: In this field enter the name of the city as the residential address.
- Given Name: Enter your first name and middle name (Maximum 45 characters are allowed & keep in mind Dr, Col, etc types of words are not allowed)
- Surname (Optional): Type your surname (Maximum 45 characters are allowed)
- Date of Birth: Enter your birth date as shown in birth certificate (Type birth date in DD/MM/YYYY format)
- Email ID: Enter your permanent email id
- Do you want your login id to be same as Email ID?: Tap on yes to generate your new login id same as the email id
- Login ID: Type any text in this section, after that click on check availability to check if it’s available or not
- Password: Type strong password of minimum 8 character and a maximum of 14 characters which contains at least one uppercase alphabet or lowercase alphabet and at least one number
- Confirm Password: Re-enter password for confirmation
- Hint Question: Select any question from the dropdown menu
- Hint Answer: Type the answer of selected hint question in the respective box
- Enter Characters Displayed: Type the text as displayed in the image and click on “Register” button
Step 4: You will see a registration confirmation screen with a message like “Thank you for registering on the passport seva portal”.
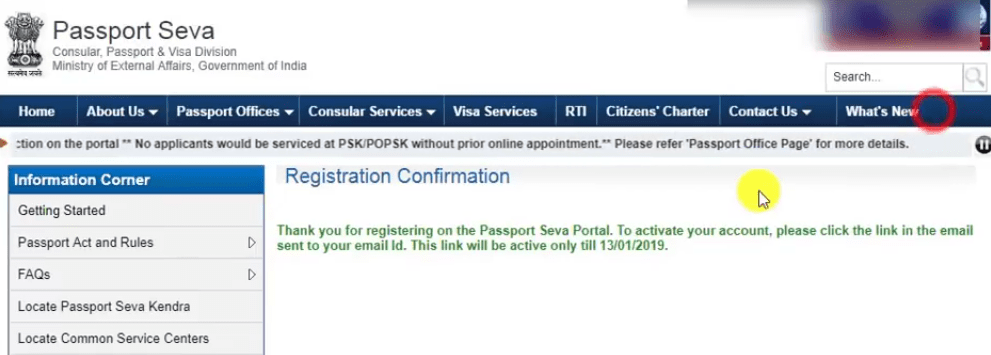
Step 5: Currently, your account is inactivated. To activate your account you need to click the link in email send to your email id.
Step 6: You will receive an email from passpopt.admin with the subject of registration confirmation as shown in below image.
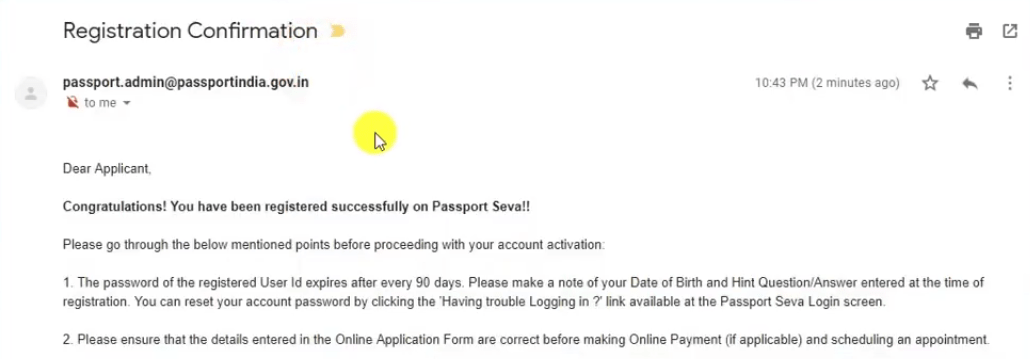
Step 7: Scroll down and tap on the link. Once you click on the link you will be redirected to the passport seva website.
Step 8: Here you need to enter your user id and click on the submit button. That’s it your account has been successfully activaed on Passport India website.

Procedure To Login To Your Account
Once you create an account on passport india website, using the respective login id and password you can sign in to your account.
Step 1: First, visit the official website of the Passport Seva www.passportindia.gov.in.
Step 2: On the left side, you can find the four different color of boxes available in Green, Yellow, Blue and Orange.
Step 3: To login to your account click on “Existing User? Login” option is available in Green color.

Step 4: Enter your login id and tap on continue button to login and enter your password.

Choose Application Type
Step 1: After successfully logged in click on the “Application Home” tab available at the top left corner of the screen.
Step 2: Inside the application home, there are so many options available. To apply for a new passport you need to click on the “Apply for Fresh Passport/Re-issue of Passport” option.
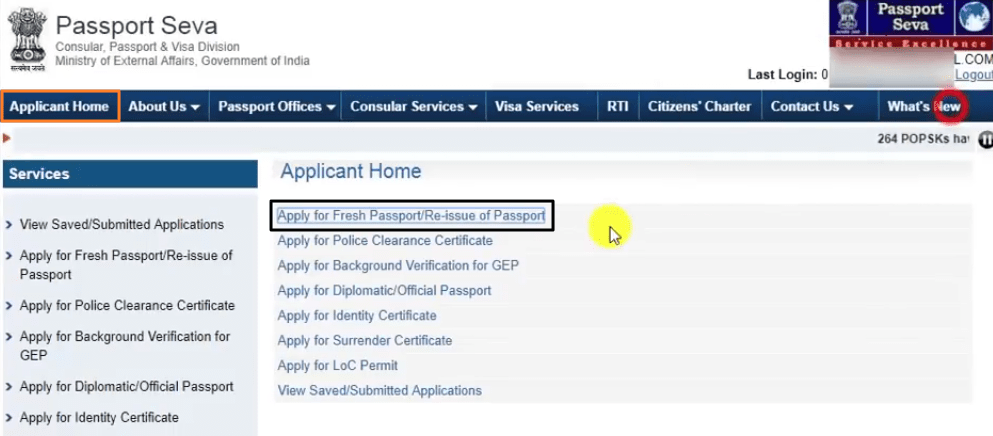
Step 3: There are two alternative options available to apply for a fresh passport or re-issue of a passport is given below.
- Alternative 1: Simply fill the application form online.
- Alternative 2: Download the soft copy of the form, fill it offline and upload the filled form.
Step 4: If you want to apply it online then click on the option “Click here to fill the application form online”.

Step 5: Select the state and your district to be specified under the Present Residential Address section of the application form.

Step 6: In next screen you need to select the some options as given below.
- Applying for: Select the “Fresh Passport” option. If you want to re-issue then select the section option.
- Type of Application: Select Tatkaal option if you want passport fast otherwise select the normal option.
- Type of Passport Booklet: Select any 36 or 60 page option according to your requirement.

Step 7: After you select above options click on the Next button and enter the applicant details.
Applicant Details

- Given Name: Enter your first name and middle name (Maximum 45 characters are allowed & keep in mind Dr, Col, etc types of words are not allowed)
- Surname (Optional): Type your surname (Maximum 45 characters are allowed)
- Gender: Select from Male, Female and Transgender
- Have you ever been known by other names (aliases)?: If you known by other names then select yes and enter the name. Otherwise select no option
- Have you ever changed your name?: If you changed your name in past then select yes otherwise select the no option
- Date of Birth: Enter your birth date as shown in birth certificate (Type birth date in DD/MM/YYYY format)
- Is your place of birth out of india?: If your birth place is out of india then select yes otherwise no
- Place of Birth (Village/Town/City): Type your birth place
- State/UT: Select your state
- District: Select your district
- Marital Status: Select your marital status from widow/widower, divorced, single and separated
- Citizenship of India by: Select your citizenship from birth, registration/naturalization and descent
- PAN Number (Option): Enter your pan number if available
- Voter id (Option): Enter your voter id card number if available
- Employment Type: Select your current employment type from the different options suitable to you
- Is either of your parent (in case of minor)/spouse, a government servant?: Select no otherwise select yes if you are in
- Education Qualification: Select your education qualification
- Is applicant eligible for Non-ECR category: Select option according to your eligibility
- Visible distinguishing mark: Optional field
- Aadhaar Number: Type your aadhaar number
After that agree to the terms and condition by click on the yes button and click on the next button.
Family Details
Next screen enter your father, mother or legal guardian name if applicable and click on next button.

Present Residential Address
Fill the details such as is your present address outside of india, house number and street name, village/town/city, state/ut, district, police station, pin code, mobile number, email id and tap on the next button.

Emergency Contact
You will redirected to the emergency contact page and enter your name and address, mobile number, telephone number and email id of other person.

Identity Certificate/Passport Details
In this page select the option for different fields is given below.
- Have you ever held/hold any identity certificate
- Details of previous/current diplomatic/official passport
- Have you ever applied for passport but not issued

Other Details
In this page you need to select the different option according to your profile as shown in below image. If you are applying passport for the first time then select no for all options.

Passport Details Verification
Now verify your details such as your name, address, date of birth, etc. All this shown details are printed on your passport. Make sure all entered details are correct. Once you verify all details click on next button.
Self Declaration
In this page you need to select the proof of birth, proof of present residential address.
If you want to enroll for the passport seva sms service then select yes option and it’s cost you Rs.50. After that agree terms and condition and click on the submit form option.
That’s it your application form has been submitted successfully and you will also receive the application reference number (ARN).

Pay & Schedule Appointment
Step 1: Now you need to schedule the appointment by click on the “Pay and Schedule Appointment” option.

Step 2: Select the payment mode from two different options is given below.
- Online Payment (Internet Banking, Credit Card, Debit Card)
- Challan Payment (Pay in cash at SBI branch)
Step 3: Select the “Online Payment” option and click on next button. Select the appointment quota > select the desired passport seva Kendra or passport office and click on the next button.
Step 4: After that click on “Pay and Book Appointment” button and you will redirected to the state bank of india multi option payment system to complete the payment.
Step 5: Select your mode of payment, follow the instruction carefully and make your payment. (Please do not refresh the page while payment is processing)
Step 6: After your payment successful, your appointment will be booked automatically for the selected passport seva Kendra or passport office.
Step 7: Take a printout of the application receipt (ARN) and carry it along while visiting the passport seva Kendra on the given appointment time and date.